This post is also available in: 日本語
Introduction
This article shows you how to build wordpress media from scratch using the Google CloudPlatform (GDP). This article is divided into the first part and the second part. We will introduce the site construction using the following services.
- Servers, etc.: Google Cloud Platform (GCP)
- Domains: GoogleDomains (Google Domain)
- CMS: WordPress
In the first part of this article, I showed you how to install WordPress on the Google CloudPlatform (GDP) to bring up the initial screen.
Please check this if you like.
We will proceed from the status of “You can display the word press page by IP address.”. Here’s how to use Google Cloud Platform (GDP) to tie together domains you’ve purchased from Google domains.
Make the IP address static
The IP address immediately after creation is assigned an ephemeral.
If the IP address changes every time you deploy, it becomes complicated, so you need to change the fixed IP address = static IP address.
Open the menu on the left side of the main Google Cloud Platform (GDP) dashboard.
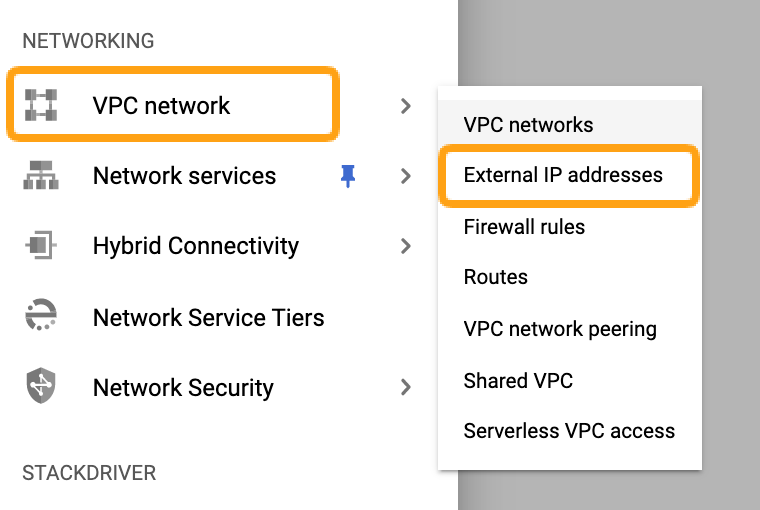
Choose Networking > VPC Network > External IP addresses. Changes the ephemeral statically.
If you click Static, the following display appears:.
If you can confirm that the type has been changed to “Static”, you are done.
DNS Settings
Now let’s move on to configuring DNS. Specifically, DNS setting is a task to associate an IP address with a domain you bought.
DNS, or Domain Name System, is a system that manages domains and IP addresses in association with each other. An IP address such as 12.123. 123.33 is very difficult to understand as it is, but by linking it to a simple string such as xxx.com, the convenience of site access is improved.
Click CREATE ZONE.
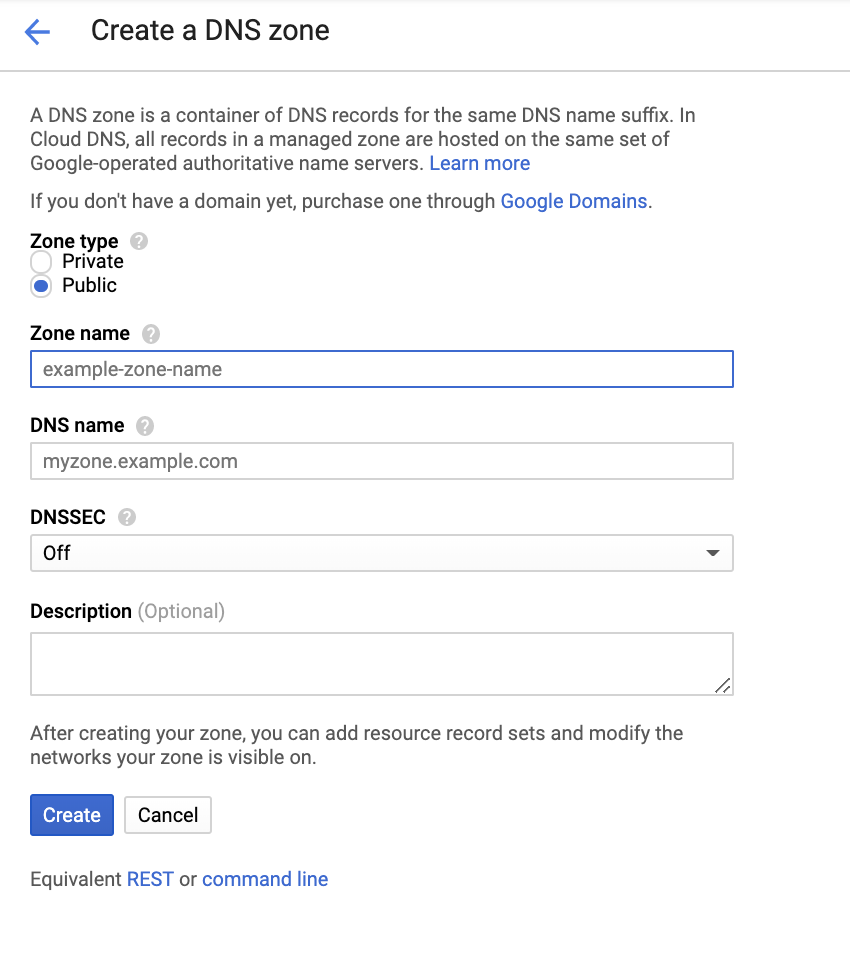
- Zone Name: Any zone name
- DNS Name: Enter Domain
- DNSSEC: Off
Now press Create.
I’ll turn it off for now. (You can turn it on from the setting.)
Click Add Recordset.
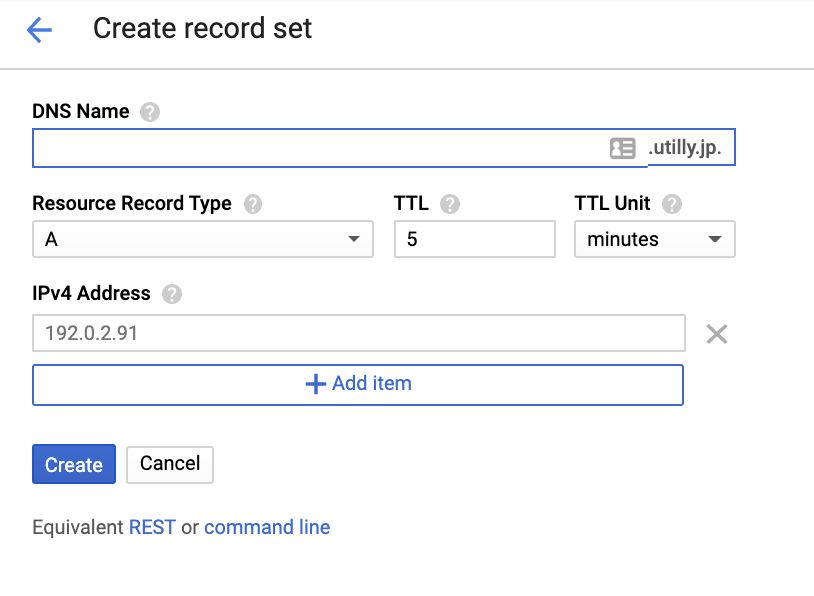
Enter the following:.
Specify A for the resource record type. Enter the static IP address above for the IPv4 address.
- DNS Name: You do not need to enter
- Resource record: A
- TTL: 300
- TTL Unit: seconds
- IPv4 Address: External static IP address
You can see that the A record has been added.
Note that the orange boxes will be needed later for the domain registrar (= Google Domain) input.
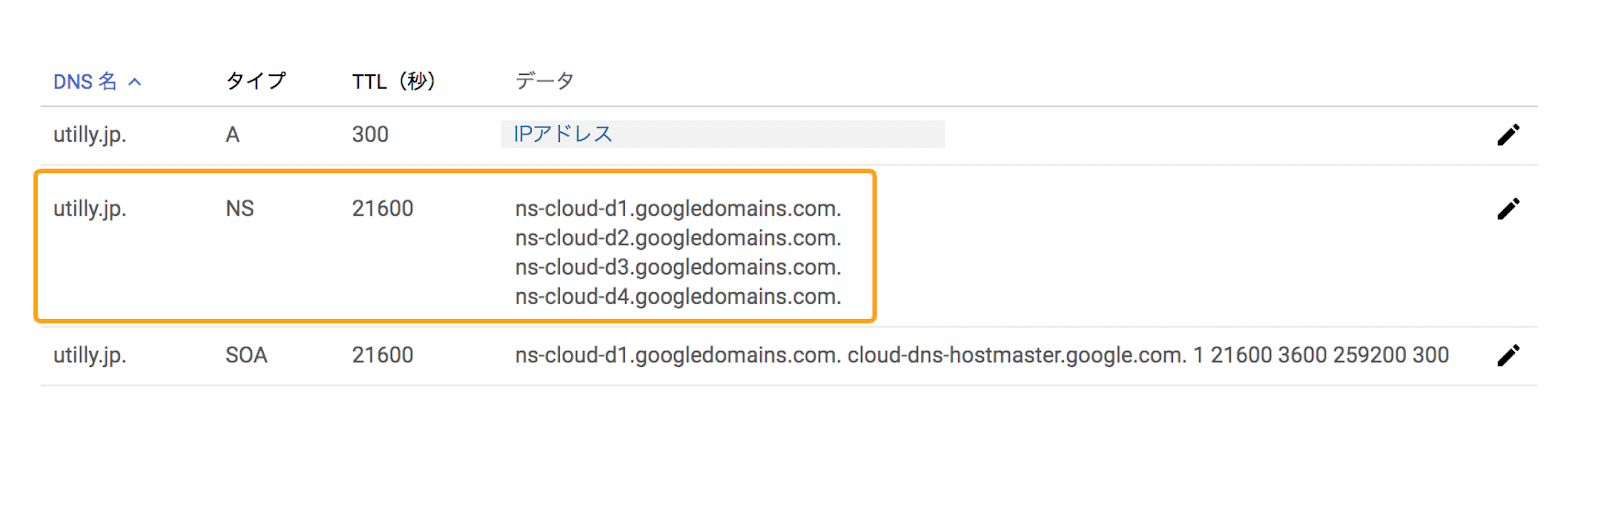
The registrar is the company that registers the domain
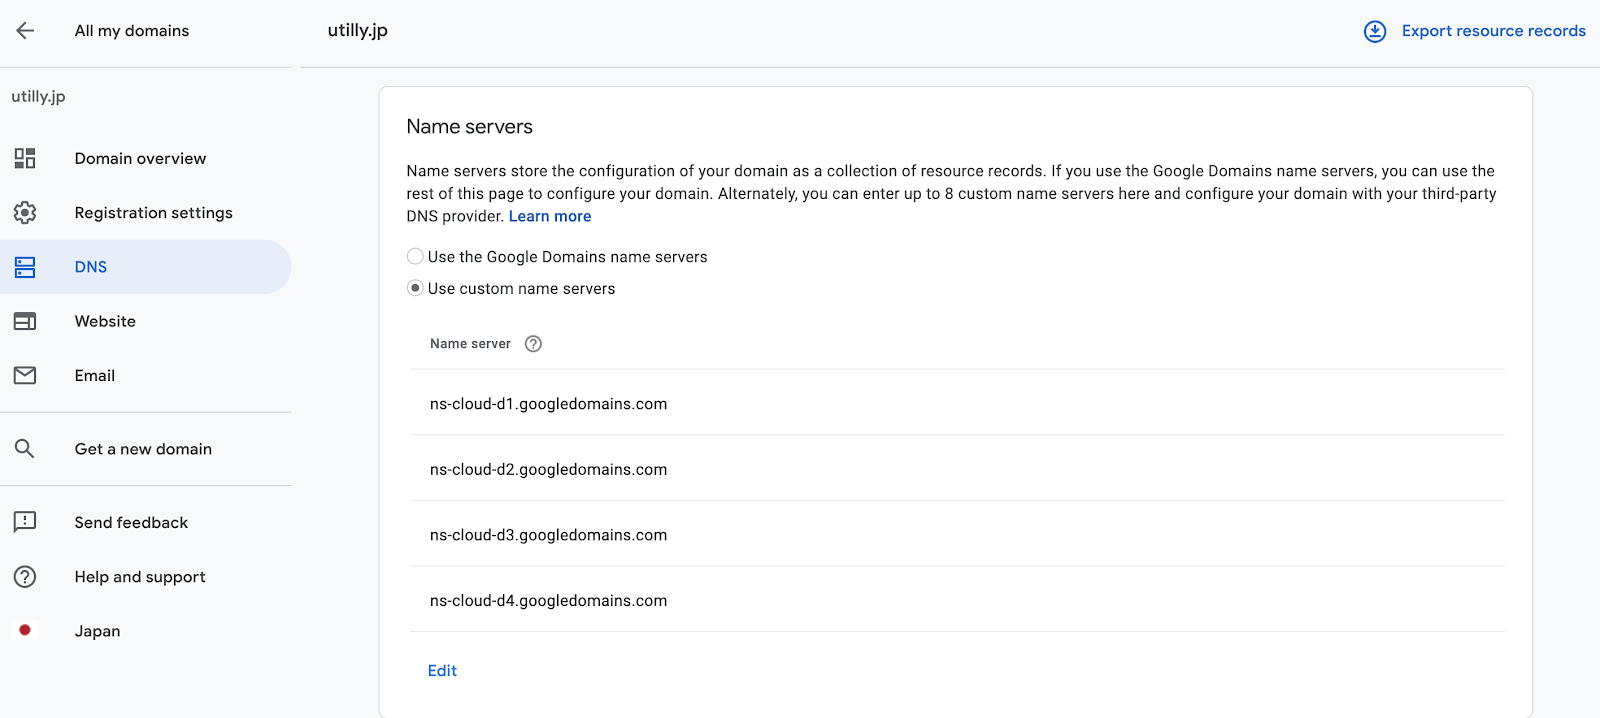
Click Use a custom name server. I will insert a string like “ns-cloud-d1.googledomains.com” which I noted earlier. Add the “+” and add each of the four. Click Save when finished.
Please note that you will not be able to access the site if you return it to the GoogleDomains server.

After a while, the site display appears in the specified domain. The delay is often less than 10 minutes, but the wait can be up to 48 hours.
Change WordPress URL
We’re almost there. After you confirm the display, change the URL setting of Word Press to the correct one.
Go to the general settings screen from Settings > General. Change “WordPress Address (URL)” and “Site Address (URL)” at the same time and press Save.
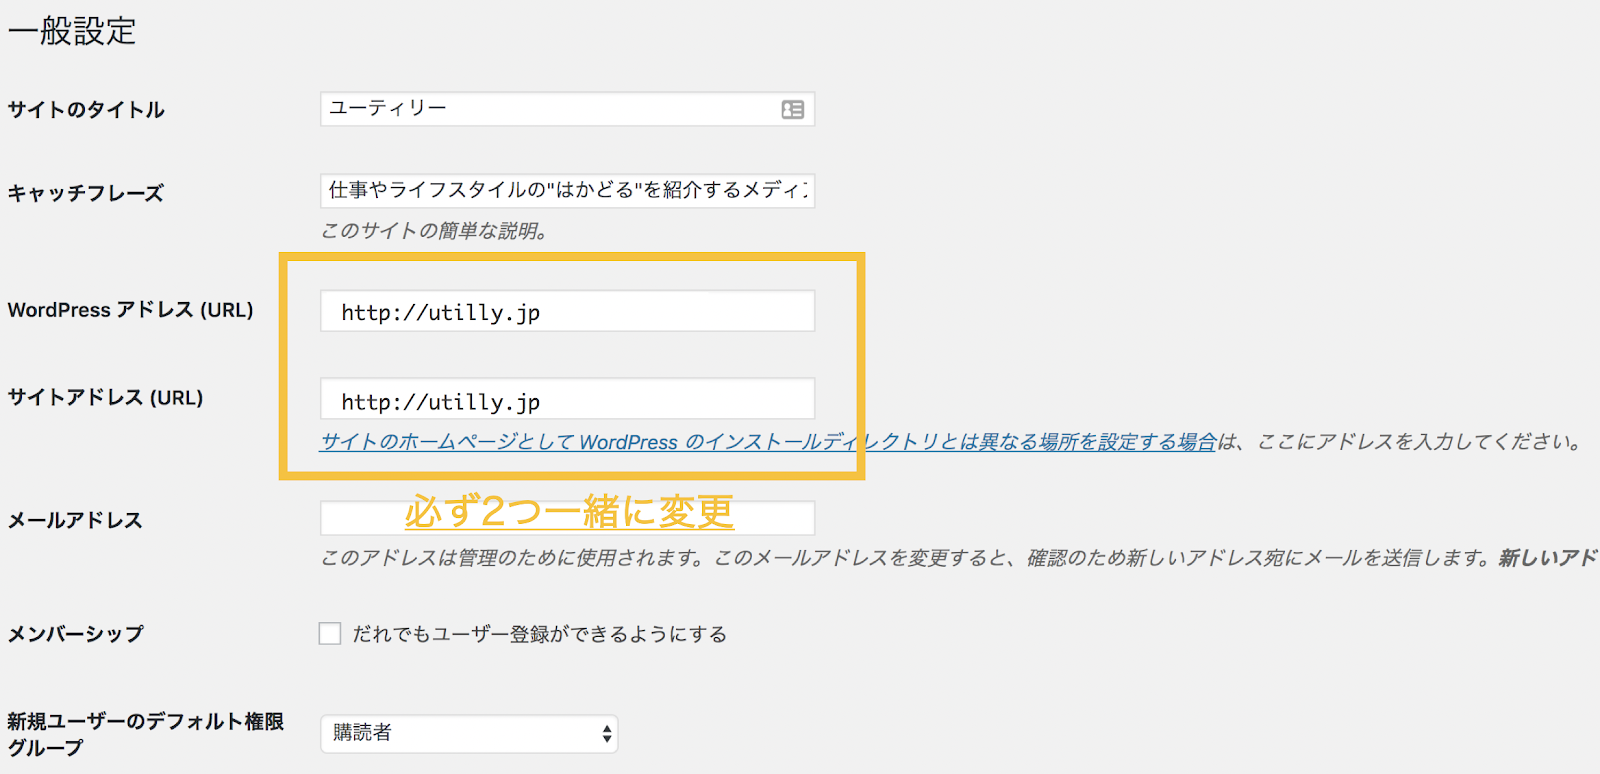
Now you can change the management screen to the specified domain.
Mail Settings
For example, there may be a need to be able to send mail using the set domain, such as handling inquiries, but I will explain how to set it up.
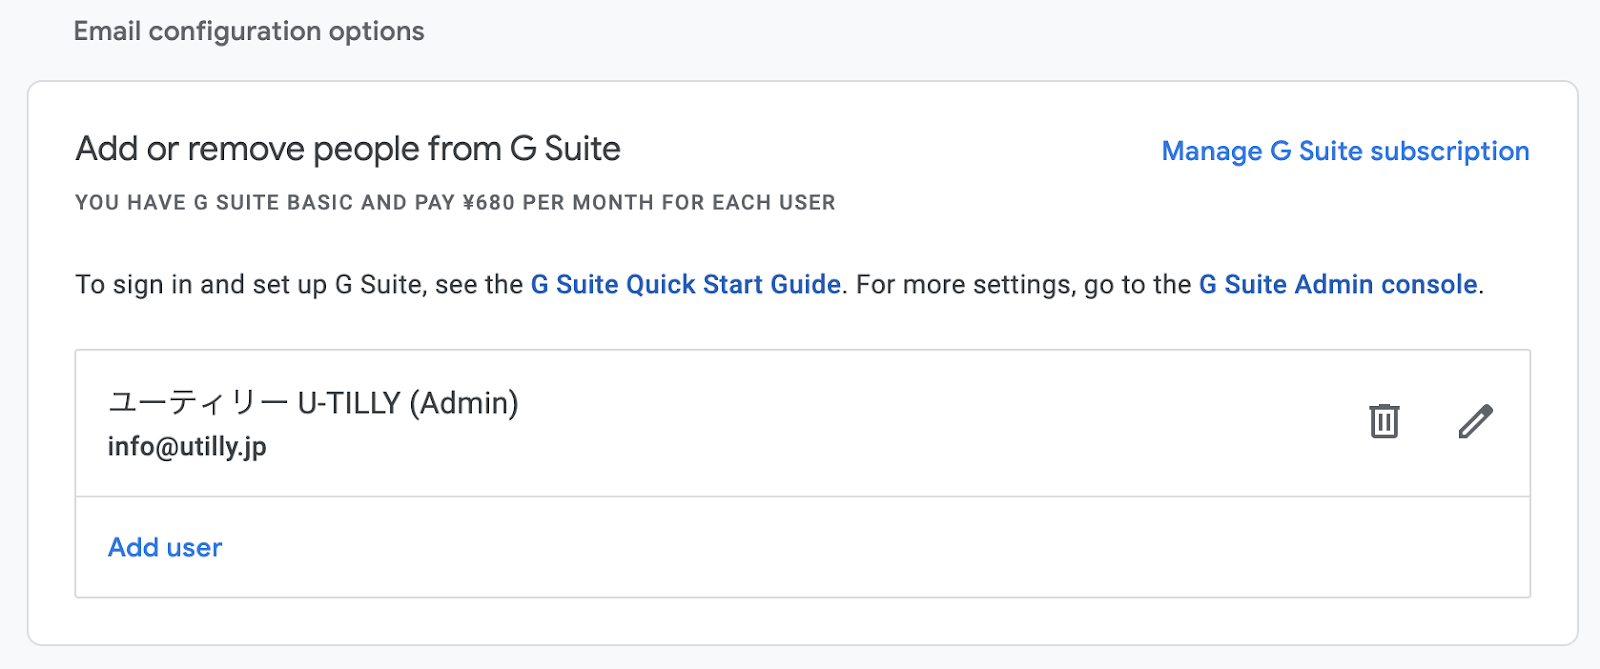
Register with G suite
You can register with Gsuite on the Google domain. You can also pay immediately with the credit card you paid when you purchased the domain. Gsuite requires a separate monthly fee. ※ Minimum: 640 yen ~
MX Record Configuration
To map mail to the server, you need to configure MX records in GCP.
MX records are resource records for specifying mail exchange (mail servers, hosts that deliver mail)
See the official site for more details on MX record settings.
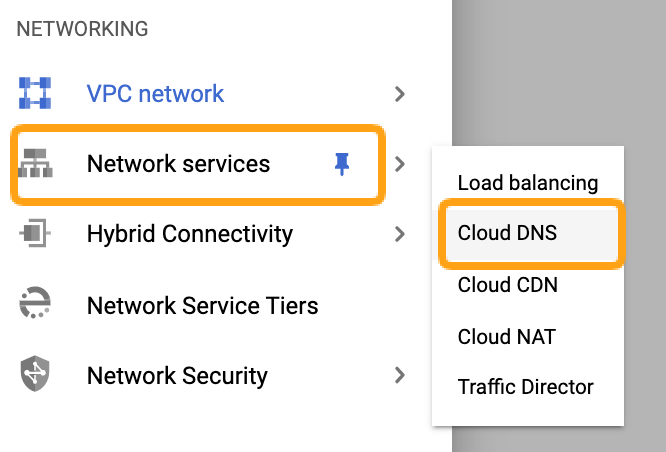
Open the GCP Cloud DNS.

Select the same zone as before and add a new recordset in the same flow as you added the A record.
- DNS name can be blank
- Resource record type: MX
- TTL: 3600
- TTL Unit: seconds
- Configuration and mail servers: (Example )utilly.jp
- add item: see below
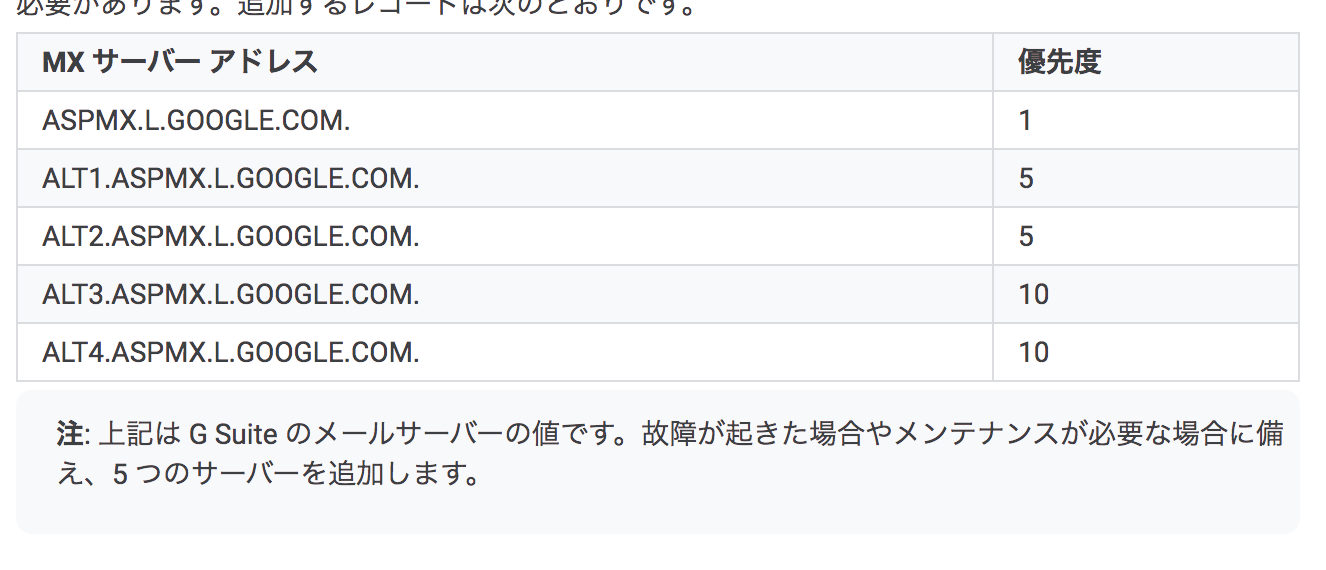
To add an item, you need to add an MX record for your suite.
Detail is here
Just in case, please send a test mail. If it arrives safely, I can say it is reflected without any problem.
And finally,
In this article, you learned how to use Google Cloud Platform (GDP) to build WordPress to tie together domains you’ve purchased from Google domains. Google domain linking is a bit peculiar, but I hope you understand the content. If you want to know from the beginning, please refer to the previous article.
About SSH Certification
This article doesn’t go as far as making it HTTPS (= Register SSH Certificate).
In the following article, I will introduce the registration of SSL certificate, and it is completed.
https://utilly.jp/en/article/wordpress-ssl/